
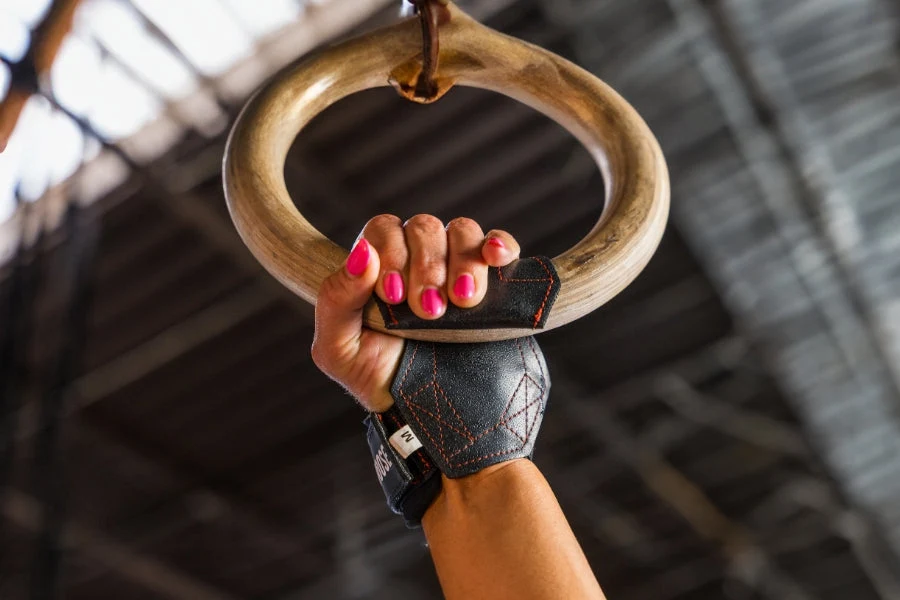
When strong back muscles are waiting on tired hands
The bar stops, but your back has more. Your fingers opened first. Your target muscles missed the planned work. That gap appears in rows, deadlifts, pull-ups, and pulldowns. It does not mean you need more weight. Sometimes, your hand-to-bar connection needs more thought. Traditional straps help, but wrapping takes time. Gloves may reduce direct feel. Modern lifting grips offer another path. A setup improved by using the best weightlifting grips should support bar control without becoming hard to release each week. This guide explains how to judge fit, grip length, wrist comfort, speed, and exercise use. We also cover sizing, setup, simple tests, and care. The aim is not to remove grip training. It is to help your chosen muscles complete the set when your hands begin to fade.
Why look beyond a basic strap? A self-supporting palm section can wrap around a bar with less setup. A quick-release design lets you open your hands when the set ends. Built-in wrist support may also help during selected pushing movements. Still, the product must match your wrist and sit correctly in your hand. A loose or tight fit can change pressure and control. Hand size does not decide the Pro model’s wrist size. The maker directs users to measure around the wrist bone. Its standard grip length is 6.25 inches, while the Pro Plus adds half an inch. Those details matter for larger hands or thicker bars. The sections below show how to measure, test, and use lifting grips with purpose.
How to measure your wrist before selecting lifting grips
Wrap soft tape around your wrist bone. Keep your hand relaxed. Do not measure your palm or glove. Keep tape secure without pressing skin. Record the result in inches or centimeters. Check the current size chart. Measure once more before placing the order. Size up if your reading falls on a boundary.
- X-small for wrists measuring five to six inches
- Small for wrists measuring six to seven inches
- Regular or large for wrists measuring seven to eight inches
- Extra-large for wrist sizes above eight inches
The wrist strap should feel secure, not tight. The palm piece should reach just beyond the first finger knuckles. You should be able to rotate it behind your hand. That position keeps it clear when it is not needed. Test both hands because wrist size may differ slightly. Recheck the fit before using a heavy load. Correct sizing makes every later step easier.
What proper grip setup should feel like during each set
Begin with an empty bar or light machine handle for one practice round. Practice wrapping both grips before loading weight on either side. Keep the palm material flat against the bar without a fold or twist. Use these four moves to check your setup during the same warm-up.
Move one: place the wrist straps
Set each strap carefully at the base of the hand. Leave enough room for normal blood flow and movement. The straps should not pinch when your wrist bands.
Move two: wrap the bar
Lay the gripping section over or under as directed. Close your hand and create firm contact on the bar. Avoid folds that may cause uneven pressure.
Move three: test the release
Open both hands after a light test rep. The bar should release without a long unwrapping step. Practice until this action feels natural.
Move four: judge the target muscles
Notice whether your back or legs now lead the set. Keep the same safe form and planned load. Add weight only when control remains steady.
Why smart use and regular checks protect your training
Lifting grips do not erase all fatigue. Begin with loads you can control. Keep the palm material smooth. Check buckles, thread, straps, and grip surfaces. Stop if any part looks damaged. Keep your wrists neutral when needed. Release the bar if pain or numbness appears. Ask a coach when your setup feels uncertain.
- Use grips only on exercises they fit safely.
- Keep the gripping surface free from chalk buildup.
- Store each pair dry and away from sharp items.
- Follow the maker’s current care instructions.
Do not soak, wash, cut, or alter the grips. Let sweat dry before placing them inside a bag. Keep the hook-and-loop areas clear of lint. Grip practice should remain part of a balanced program. Use assistance when it serves the goal of the set. Train without it when direct hand strength is the goal. Honest use helps the tool support your plan.
Let your grip choice serve the work you planned to do
Good lifting grips should make training simpler, not careless. We can start with an exact wrist measurement and fit test. We can practice release before adding weight. Exercise choice and sound form still lead. Regular checks help catch early wear before it affects the session. Grip assistance also works best when it has a clear purpose. Use it when your hands limit the muscles you mean to train. Skip it when grip strength is the main task. Review the size chart, consider your bars, and choose with care. Then return to the gym ready to make each planned set count.
